Trackers and Analytics UI
Create Trackers and Analytics UI
This tutorial contains step-by-step instructions on how to create a Trackers and Analytics UI.
Limited Availability
Currently, the Tracker and Analytics UI is supported for audio conversations only.
To create a fully functional version of the Trackers and Analytics UI, you must first:
-
Set up Trackers
Add Trackers to your account using the platform-based Managed Trackers Library or Custom Trackers. View the Trackers associated with your account at Your Trackers. -
Enable Speaker Separation:
Make sure that Speaker Separation is enabled when submitting data to the Async API. Include bothenableSpeakerDiarization=trueanddiarizationSpeakerCount={number}as request parameters. Read more at Speaker Separation > Query Params.If these optional parameters are set, the Speaker Analytics component can generate high-resolution information.
-
Process a conversation and receive a conversation ID
Process a conversation using async or streaming as described at Process a Conversation > Overview. When you process a conversation, you receive aconversationIdneeded to generate Conversation Intelligence from the conversation. -
Make sure Trackers are detected
Read the step-by-step instructions in Trackers.
Note that once the raw conversation data is processed by Symbl.ai and a conversation ID is generated, there is no way to retroactively add Trackers or enable speaker separation. In this case, you need to submit the conversation data to the Async API again for processing.
To create the Trackers and Analytics UI:
1. Send a POST request to Async Audio API
POST request to Async Audio APIProcess your audio file with Symbl by sending a POST request to the Async Audio URL API. This returns a conversationId.
If you have already processed your audio file and have the conversationId, skip to Step 2.
POST https://api.symbl.ai/v1/process/audio/url
Sample Request
curl --location --request POST "https://api.symbl.ai/v1/process/audio/url" \
--header 'Content-Type: application/json' \
--header "Authorization: Bearer $AUTH_TOKEN" \
--data-raw '{
  "url": "https://storage.googleapis.com/rammer-transcription-bucket/small.mp3",
  "name": "Business Meeting",
  "confidenceThreshold": 0.6,
}'
The url is a mandatory parameter to be sent in the request body and must be a publicly accessible.
For more sample requests, see detailed documentation for Async Audio API URL.
Sample Response
{
  "conversationId": "5815170693595136",
  "jobId": "9b1deb4d-3b7d-4bad-9bdd-2b0d7b3dcb6d"
}
2. Enable CORS (for files hosted on Amazon S3)
CORS (Cross-Origin-Resource-Sharing) is required for files hosted on Amazon S3.
Why do I need to enable CORS?
The Trackers and Analytics UI has a visual component that renders waveform visuals based on the audio resource in the URL. To generate such visuals, the browser requires read-access to the audio frequency data, for which CORS configurations need to be enabled. Modern browsers by default, prevent reads to audio frequency through CORS.
Enabling CORS is required only if you want to get the Trackers and Analytics UI in the waveform visualization, as an audio waveform player. If you do not enable CORS, you can still access the same insights, but the UI shows the standard audio player instead of the waveform.
If your audio file is not on Amazon S3, skip to the next step.
To enable CORS for Amazon S3 Bucket:
-
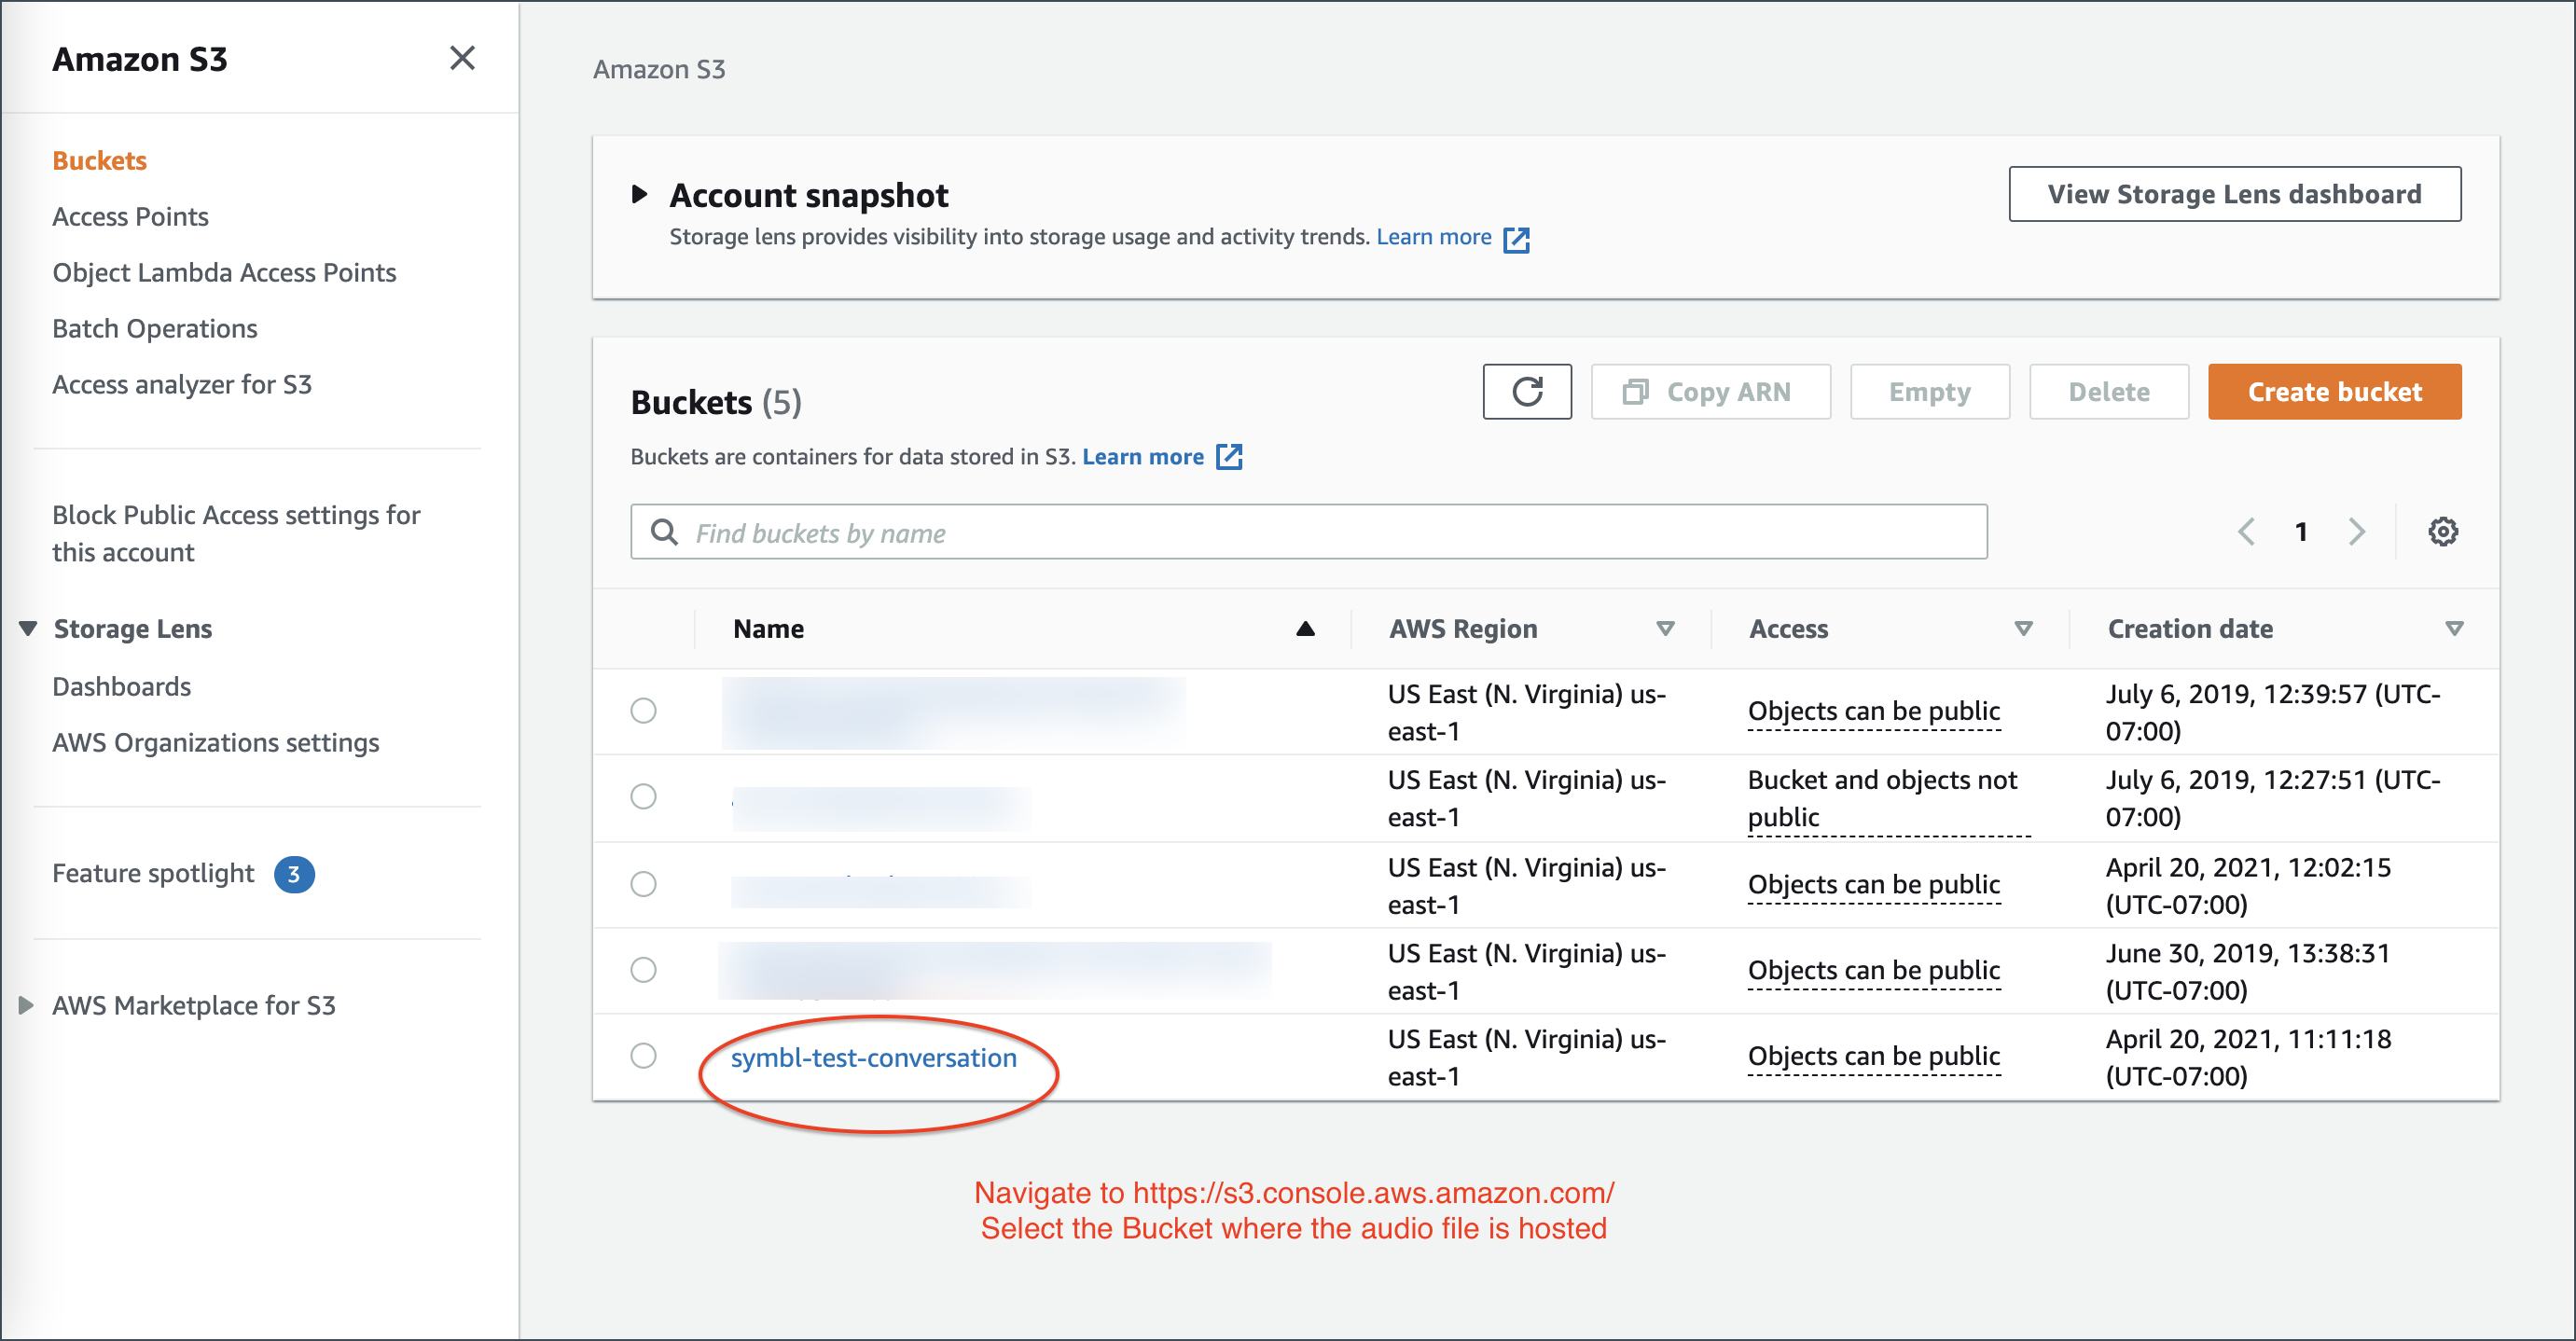
Go to Amazon S3 Console (https://s3.console.aws.amazon.com/).
-
Select the Bucket where the audio file is hosted.

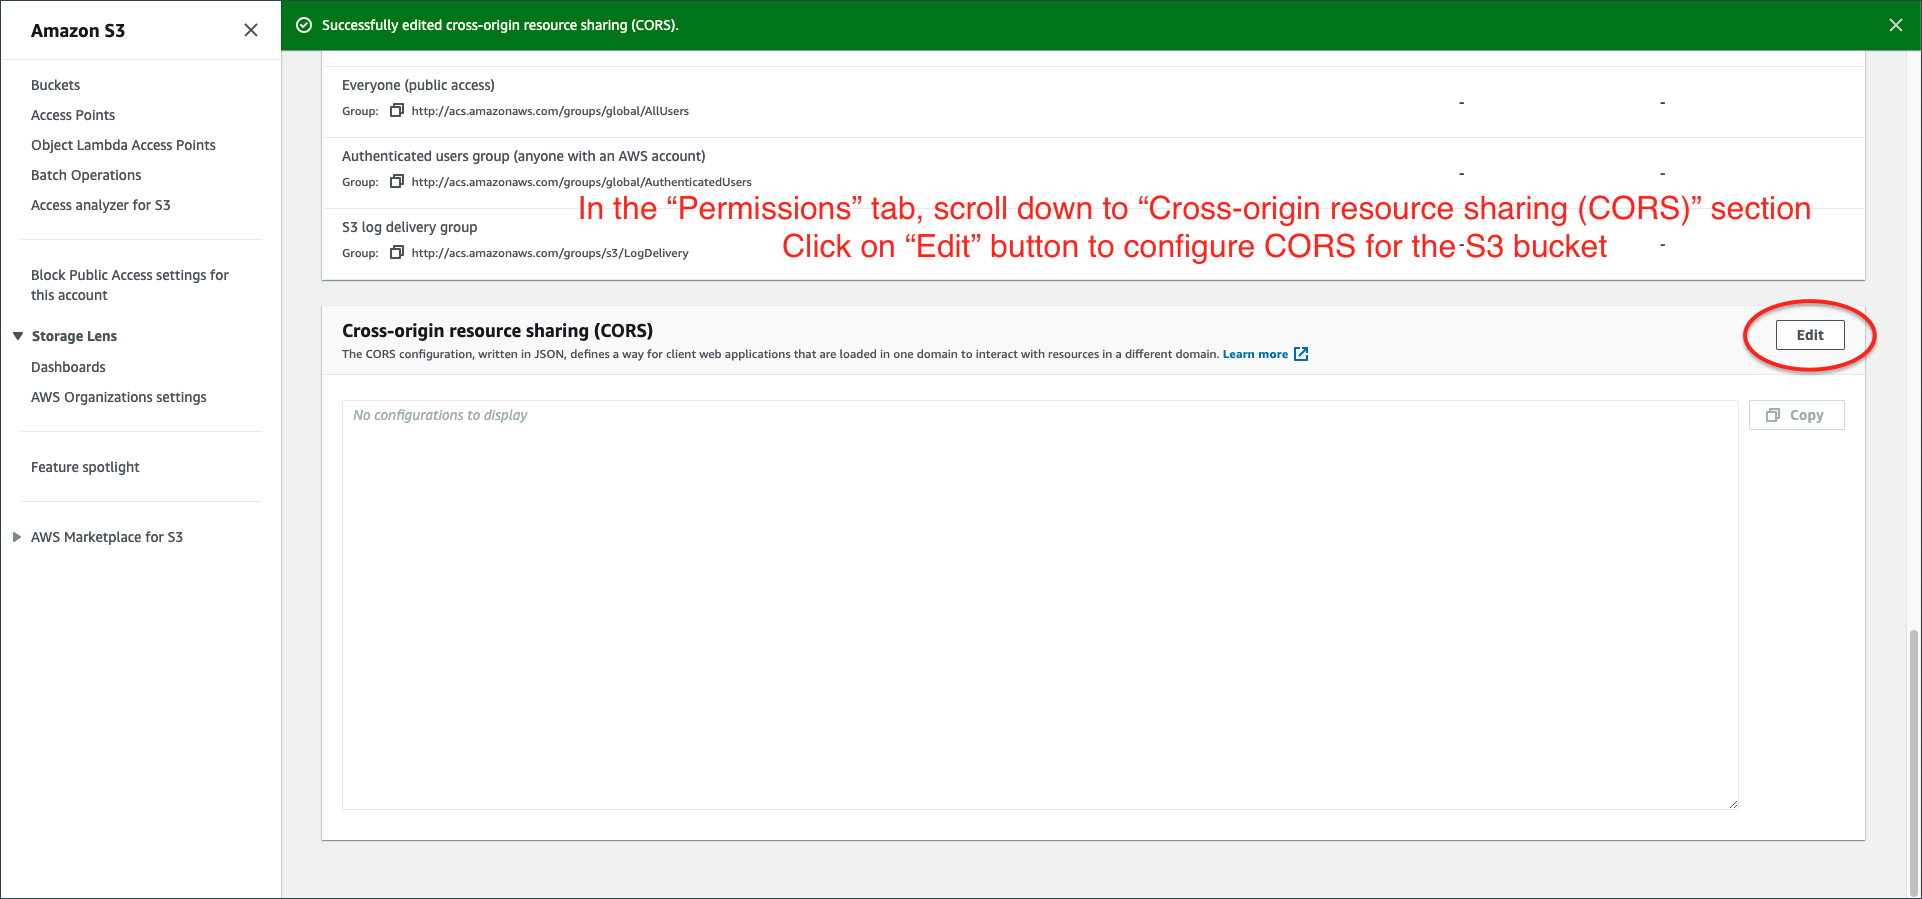
- Go to the Permissions tab.

- Scroll down to the Cross-Origin resource sharing (CORS) section.

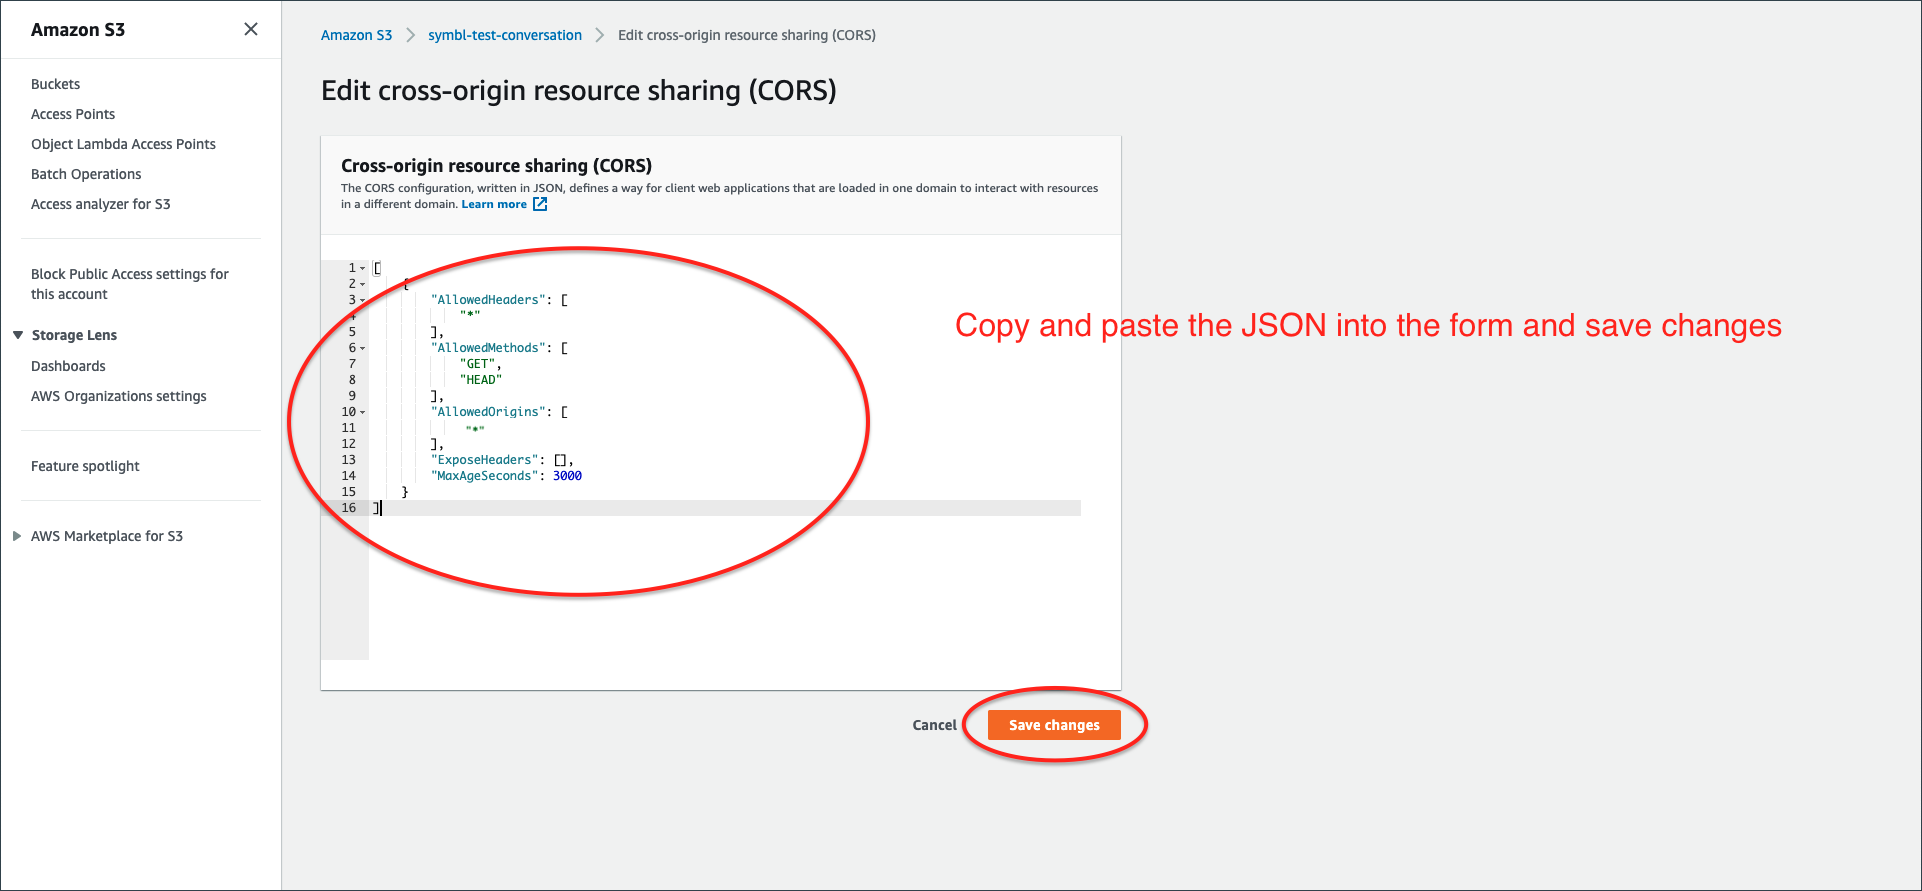
- Edit the JSON to enable CORS for the Symbl URL.

[
    {
        "AllowedHeaders": [
            "*"
        ],
        "AllowedMethods": [
            "GET",
            "HEAD"
        ],
        "AllowedOrigins": [
            "*"
        ],
        "ExposeHeaders": [],
        "MaxAgeSeconds": 3000
    }
]
3. Send POST request to Experience API
POST request to Experience APIUsing the conversationId from Step 1, send a POST request to Experience API:
POST https://api.symbl.ai/v1/conversations/{conversationId}/experiences
Request Body
curl --location --request POST "https://api.symbl.ai/v1/conversations/$CONVERSATION_ID/experiences" \
--header 'Content-Type: application/json' \
--header "Authorization: Bearer $AUTH_TOKEN" \
--data-raw '{
  "name": "audio-summary",
  "audioUrl": "https://storage.googleapis.com/rammer-transcription-bucket/small.mp3",
}'
Request Body Params
| Field | Required | Type | Description |
|---|---|---|---|
name | Mandatory | String | audio-summary |
audioUrl | Mandatory | String | The audioUrl must match the conversationId. In other words, the audioUrl needs to be the same URL that was submitted to the Async API to generate the conversationId. |
summaryURLExpiresIn | Mandatory | Number | This sets the expiry time for the summary URL. It is interpreted in seconds. If the value 0 is passed the URL will never expire. Default time for a URL to expire is 2592000 which is 30 days. |
disableSummaryURLAuthenticationis not supported as we accept only secure URL generation to comply with the mandatory security requirements.
Response Body
{
    "name": "audio-summary",
    "url": "https://meetinginsights.symbl.ai/meeting/#/eyJzZXNzaW9uSWQiOiI1ODU5NjczMDg1MzEzMDI0IiwidmlkZW9VcmwiOiJodHRwczovL3N0b3JhZ2UuZ29vZ2xlYXBpcy5jb20vcmFtbWVyLXRyYW5zY3JpcHRpb24tYnVja2V0L3NtYWxsLm1wNCJ9?showVideoSummary=true"
}
Now you can open the URL returned in the response body to view the Trackers and Analytics UI.
What's next
- View the complete description of Trackers and Analytics UI API
- Learn how to White label your Trackers and Analytics UI Page.
Tuning and adding custom domain is not supported for Trackers and Analytics UI yet.
Updated almost 2 years ago
